If you encounter the error "Virtualized VT-x/EPT is not supported on this platform" in VMware Workstation even though virtualization is enabled in your BIOS it’s likely caused by interference from Windows features such as Hyper-V, Device Guard, or Core Isolation.
This guide walks you through a step-by-step process to resolve this issue and restore full virtualization support for VMware.
Why This Error Occurs
VMware Workstation requires direct access to CPU virtualization features like Intel VT-x and EPT (Extended Page Tables). However, Windows features like Hyper-V, Credential Guard, and Core Isolation can take over these hardware resources, blocking VMware—even if virtualization is enabled in BIOS.
How to Fix the VT-x/EPT Virtualization Error
1. Enable Virtualization in BIOS/UEFI
Restart your computer and enter BIOS/UEFI (usually by pressing F2, DEL, or ESC). Ensure the following settings:
- Virtualization Support:
- Enable Intel Virtualization Technology (VT-x)
- Enable Intel VT for Directed I/O (VT-d)
- Disable Intel Trusted Execution Technology (TXT)
- Boot Configuration:
- Disable Secure Boot (optional but recommended for compatibility)
Save and reboot your system.
2. Disable Hyper-V, Device Guard, and Core Isolation
Open PowerShell as Administrator and run these commands:
bcdedit /set hypervisorlaunchtype off
Set-ItemProperty -Path "HKLM:\SYSTEM\CurrentControlSet\Control\DeviceGuard" -Name EnableVirtualizationBasedSecurity -Value 0
Set-ItemProperty -Path "HKLM:\SYSTEM\CurrentControlSet\Control\Lsa" -Name LsaCfgFlags -Value 0
Disable-WindowsOptionalFeature -Online -FeatureName Microsoft-Hyper-V-All
Disable-WindowsOptionalFeature -Online -FeatureName VirtualMachinePlatform
Disable-WindowsOptionalFeature -Online -FeatureName Windows-Hypervisor-Platform
Disable-WindowsOptionalFeature -Online -FeatureName HypervisorPlatform
Disable Core Isolation:
- Go to Settings → Privacy & Security → Windows Security
- Select Device Security → Core Isolation
- Turn off Memory Integrity
Shutdown completely and wait at least 1 minute before restarting:
shutdown /s /f /t 0
3. Verify Virtualization Status
After rebooting, run the following PowerShell command to verify that virtualization is active:
Get-WmiObject -Class Win32_Processor |
Select-Object Name, SecondLevelAddressTranslationExtensions, VirtualizationFirmwareEnabled, VMMonitorModeExtensions
Ensure the following values are True:
- SecondLevelAddressTranslationExtensions
- VirtualizationFirmwareEnabled
- VMMonitorModeExtensions
You can also run the following command to check the Hyper-V requirements and status:
systeminfo | findstr /i "Hyper-V"This command will show whether Hyper-V is installed or if a hypervisor is currently active. It's a quick way to verify your system's readiness for virtualization.
4. Optional: Reinstall VMware Workstation
If VMware was previously installed while conflicting features were active, consider reinstalling:
- Uninstall VMware Workstation
- Reboot your PC
- Reinstall VMware Workstation
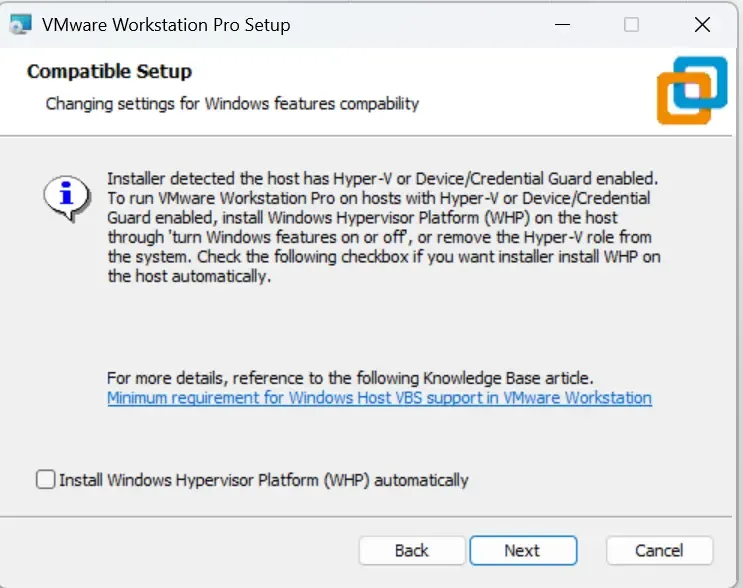
- Do not enable "Windows Hypervisor Platform" if prompted
Your virtual machine should now start without the VT-x/EPT error.
How to Revert the Changes
BIOS Settings
- Reboot into BIOS/UEFI
- Enable Secure Boot (if needed)
- Leave VT-x and VT-d enabled
Restore Windows Virtualization Settings
Run the following commands in PowerShell (as Administrator):
bcdedit /set hypervisorlaunchtype auto
Set-ItemProperty -Path "HKLM:\SYSTEM\CurrentControlSet\Control\DeviceGuard" -Name EnableVirtualizationBasedSecurity -Value 1
Set-ItemProperty -Path "HKLM:\SYSTEM\CurrentControlSet\Control\Lsa" -Name LsaCfgFlags -Value 1
Enable-WindowsOptionalFeature -Online -FeatureName Microsoft-Hyper-V-All -All
Enable-WindowsOptionalFeature -Online -FeatureName VirtualMachinePlatform -All
Enable-WindowsOptionalFeature -Online -FeatureName Windows-Hypervisor-Platform -All
Enable-WindowsOptionalFeature -Online -FeatureName HypervisorPlatform -All
Re-enable Core Isolation
- Go to Settings → Device Security → Core Isolation
- Turn on Memory Integrity
- Restart your PC
Conclusion
The "Virtualized VT-x/EPT is not supported on this platform" error is usually caused by conflicts between VMware and Windows security/virtualization features. Disabling these conflicting settings allows VMware to access the required hardware features.
All changes made in this guide are reversible, making it easy to switch between platforms like VMware, Hyper-V, and WSL2 depending on your needs.


